この続きから。

MySQL8.0のインストール方法をググるとPPAからリポジトリを追加する手法が多々ヒットする。
ところが2021年9月現在、aptでインストールできるMySQLのバージョンが8.0になっているようである。
# apt show mysql-server
Package: mysql-server
Version: 8.0.26-0ubuntu0.20.04.2
Priority: optional
Section: database
Source: mysql-8.0
Origin: Ubuntu
Maintainer: Ubuntu Developers <[email protected]>
Original-Maintainer: Debian MySQL Maintainers <[email protected]>
Bugs: https://bugs.launchpad.net/ubuntu/+filebug
Installed-Size: 113 kB
Depends: mysql-server-8.0
Homepage: http://dev.mysql.com/
Task: lamp-server
Download-Size: 9,540 B
APT-Sources: http://archive.ubuntu.com/ubuntu focal-updates/main amd64 Packages
Description: MySQL database server (metapackage depending on the latest version)
 This is an empty package that depends on the current "best" version of
 mysql-server (currently mysql-server-8.0), as determined by the MySQL
 maintainers. Install this package if in doubt about which MySQL version
 you need. That will install the version recommended by the package
 maintainers.
 .
 MySQL は、高速で安定しており、真の意味でマルチユーザな、マルチスレッドの SQL データベースサーバです。SQL (Structured
 Query Language) は世界で 最も普及しているデータベース問合せ言語です。MySQL は速さ、堅牢性および使い
 やすさを主な目標としています。
なので、普通にそのままapt installすればいい。
# apt install mysql-serverバージョンを確かめてみる。
# mysql --version
# mysql  Ver 8.0.26-0ubuntu0.20.04.2 for Linux on x86_64 ((Ubuntu))
MySQL8.0がインストールされた。
mysql_secure_installationコマンドで最低限のセキュリティ設定
mysql_secure_installationでいろいろやってくれる。
なお、コメントアウト部分は私が書いたショッボい和訳。
# mysql_secure_installation

Securing the MySQL server deployment.

Connecting to MySQL using a blank password.

VALIDATE PASSWORD COMPONENT can be used to test passwords
and improve security. It checks the strength of password
and allows the users to set only those passwords which are
secure enough. Would you like to setup VALIDATE PASSWORD component?
#バリデートパスワードコンポーネントはパスワードをテストしてセキュリティを向上させます。
#パスワードの強さをチェックし、十分セキュアなパスワードだけ設定できるようにします。
#バリデートパスワードコンポーネントをセットアップしますか?

Press y|Y for Yes, any other key for No:  #yとかYを押したらYesですよ。他のキーならNoよ。

There are three levels of password validation policy:
#パスワードのバリデーションポリシーが3レベルありまして。

LOW    Length >= 8
#弱:長さが8文字以上
MEDIUM Length >= 8, numeric, mixed case, and special characters
#中:長さ8文字以上、数字と大文字小文字、特殊文字
STRONG Length >= 8, numeric, mixed case, special characters and dictionary file
#強:長さ8文字以上、数字と大文字小文字、特殊文字、辞書ファイル

Please enter 0 = LOW, 1 = MEDIUM and 2 = STRONG:
#どれにする?

Please set the password for root here.
#ルートパスワードを設定してください

New password:
#新しいパスワード
Re-enter new password:
#もっかい入力して
Estimated strength of the password: xx
 #パスワードの強さ:xx
Do you wish to continue with the password provided?(Press y|Y for Yes, any other key for No) : y
#入力したパスワードで続けますか?

By default, a MySQL installation has an anonymous user,
allowing anyone to log into MySQL without having to have
a user account created for them. This is intended only for
testing, and to make the installation go a bit smoother.
You should remove them before moving into a production
environment.
#デフォルトでは、MySQLはインストール時に匿名ユーザ(anonymous user)を使っていまして、
#それでユーザアカウントを作らんでもMySQLにログインできるようになってるんですよ。
#これはテスト用であり、インストールをちょいとスムーズにしてくれるだけのものなんです。
#本番環境に移行する前には匿名ユーザを消すべきなんですよ。

Remove anonymous users? (Press y|Y for Yes, any other key for No) :
#匿名ユーザを消しますか?
Success.

Normally, root should only be allowed to connect from
'localhost'. This ensures that someone cannot guess at
the root password from the network.
#通常、ルートユーザはローカルホスト('localhost')からのみ接続できます。
#こうすることでネットワークから何人(なんぴと)もルートパスワードを推測できなくなります。

Disallow root login remotely? (Press y|Y for Yes, any other key for No) :
#リモートログインを禁止しますか?
Success.

By default, MySQL comes with a database named 'test' that
anyone can access. This is also intended only for testing,
and should be removed before moving into a production
environment.
#デフォルトでは、誰でもアクセスできる'test'というデータベースが生成されています。
#これもテスト用でしかなく、本番環境移行前には削除するべきものなのですが

Remove test database and access to it? (Press y|Y for Yes, any other key for No) : y
#testデータベース及びアクセス権を削除しますか?
 - Dropping test database...
Success.

 - Removing privileges on test database...
Success.

Reloading the privilege tables will ensure that all changes
made so far will take effect immediately.
#特権テーブルをリロードすると、これまでの変更が即時反映されます。

Reload privilege tables now? (Press y|Y for Yes, any other key for No) : y
#特権テーブルをリロードしますか?
Success.

All done!
#完了だっ!
さっきまではパスワードなしでrootユーザでログインできていたが、↑の設定後はパスワード入力が必要になっている。ログインするには、
# mysql -u root -pとして先ほど設定したパスワードを入力する。
phpMyAdminをインストール
GUI操作でわかりやすくMySQLを管理できるphpMyAdminをインストールする。
2021年9月現在、aptの公式パッケージにもPPAにも、PHP8.1に対応したphpMyAdminが用意されていない。依存関係としてPHP8.0関係のものがインストールされてしまう。
というわけで、今回は手動でインストールする。インストールとは言ってもファイルを配置するだけである。
# wget https://www.phpmyadmin.net/downloads/phpMyAdmin-latest-all-languages.zip #ダウンロード
# unzip phpMyAdmin-latest-all-languages.zip #解凍
# mv phpMyAdmin-latest-all-languages /var/ww/phpmyadmin #公開ディレクトリに移動
# chmod -R ww-data:www-data /var/www/phpmyadmin #所有者をwww-dataに変更
次に、NGINXの設定ファイルを書く。こんな感じ。
# vim /etc/nginx/conf.d/phpmyadmin.conf
#configuration file for phpMyAdmin
server {
        listen 80;
        server_name {ip address or domain};

        location /phpmyadmin {
                alias  /var/www/phpmyadmin/;
                index index.php;

                location ~ ^/phpmyadmin/(.+\.php)$ {
                        fastcgi_pass   unix:/run/php/php8.1-fpm.sock;
                        fastcgi_index index.php;
                        fastcgi_param SCRIPT_FILENAME /var/www/phpmyadmin/$1;
                        include        fastcgi_params;
                        fastcgi_intercept_errors on;
                        allow all;
                }
        }
}
また、↑の”phpmyadmin”はそのままだと物騒なので、ランダムな文字列に変更しておいたほうがいい。ディレクトリ名も同様。
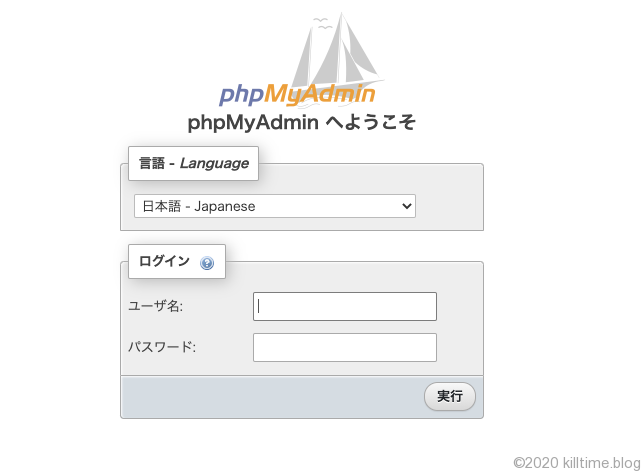
さて、{IPアドレス}/{path_to_phpMyAdmin}をブラウザのアドレスバーに入力してアクセス。
するとこんなメッセージで怒られてしまった。
Composer detected issues in your platform: Your Composer dependencies require the following PHP extensions to be installed: xml依存関係にある拡張機能(xml)がインストールされてないよ、とのこと。探す。
apt search php8.1 #<-お使いのphpのバージョンに合わせてね
...
php8.1-xml/focal 8.1.0~rc2-1+ubuntu20.04.1+deb.sury.org+1 amd64
  DOM, SimpleXML, XML, and XSL module for PHP
...
あった。インストールする。
# apt install php8.1-xml再びアクセスしてみる。
できた。
その他、phpMyAdminへの接続がうまく行かないときの確認項目
設定がうまく行かないときに確認しておきたいことを思いついたまま書いておく。また思いついたら追記する予定……
- NGINXのユーザと、PHP-FPMのオーナーが一致しているか。それぞれ設定ファイルで変更。
- 依存関係がインストールされているか。
- phpMyAdminの構成ファイル・ディレクトリのパーミッションは適切か。
作業ユーザの作成
このままでは接続こそできてもここからMySQLアクセスできるユーザがいないので、作成する。
# mysql -u -p
# パスワードを入力
create user USERNAME@localhost identified by "PASSWORD"; #ユーザ作成
grant all on *.* to USERNAME@localhost; #権限を付与
で、このユーザでphpMyAdminからログインする。
各種エラーへの対処
ログイン後の画面の下部になんかいろいろエラーが表示された。

一つずつ対応してみる。
環境保管領域が云々のやつ
phpMyAdmin 環境保管領域が完全に設定されていないため、いくつかの拡張機能が無効になっています。理由についてはこちらをご覧ください。代わりにデータベースの操作タブを使って設定することもできます。
……「環境保管領域」という聞き慣れない言葉(というか変な日本語訳)、このへんは翻訳元の英文を見てみるとわかり良いかもしれない。
- The phpMyAdmin configuration storage is not completely configured, some extended features have been deactivated. Find out why. Or alternately go to ‘Operations’ tab of any database to set it up there.
……なるほど、phpMyAdminそのものの環境設定を保管するための場所が設定されていないよ、だから拡張機能で無効になってるものもあるよ、とのこと。
“Or alternately go to ‘Operations’ tab of any database to set it up there.”と書いてあるので、phpMyAdmin上でどれかデータベースを開いて、「操作」タブからセットアップできますよ、とのこと。
ちなみにこれを設定してくれるsqlについてもphpMyAdminの構成ファイルに用意されていて、ルート直下から sql/ ディレクトリ内、create_tables.sqlをphpMyAdminにインストールしてもよい。
$ scp -i ~{秘密鍵} -P {ポート} {ユーザ名}@{IPアドレス}:/var/www/phpmyadmin/sql/create_tables.sql create_tables.sqlサーバ側からクライアント側にファイルを転送しまして、
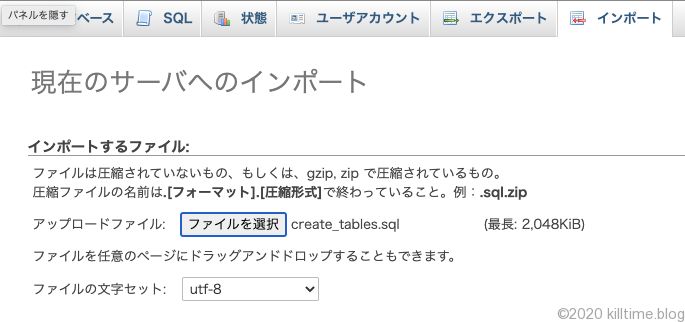
ブラウザ経由、phpMyadminの「インポート」タブからアップロードすればOK。
さらに、設定ファイルの記述も変更する。phpMyAdminのディレクトリ直下で、
cp config.sample.inc.php config.inc.phpとして、サンプルファイルから設定ファイルの正本を作って、テキストエディタで編集。以下の部分のコメントアウトを外す。
編集前:
///* Storage database and tables */
//$cfg['Servers'][$i]['pmadb'] = 'phpmyadmin';
//$cfg['Servers'][$i]['bookmarktable'] = 'pma__bookmark';
//$cfg['Servers'][$i]['relation'] = 'pma__relation';
//$cfg['Servers'][$i]['table_info'] = 'pma__table_info';
//$cfg['Servers'][$i]['table_coords'] = 'pma__table_coords';
//$cfg['Servers'][$i]['pdf_pages'] = 'pma__pdf_pages';
//$cfg['Servers'][$i]['column_info'] = 'pma__column_info';
//$cfg['Servers'][$i]['history'] = 'pma__history';
//$cfg['Servers'][$i]['table_uiprefs'] = 'pma__table_uiprefs';
//$cfg['Servers'][$i]['tracking'] = 'pma__tracking';
//$cfg['Servers'][$i]['userconfig'] = 'pma__userconfig';
//$cfg['Servers'][$i]['recent'] = 'pma__recent';
//$cfg['Servers'][$i]['favorite'] = 'pma__favorite';
//$cfg['Servers'][$i]['users'] = 'pma__users';
//$cfg['Servers'][$i]['usergroups'] = 'pma__usergroups';
//$cfg['Servers'][$i]['navigationhiding'] = 'pma__navigationhiding';
//$cfg['Servers'][$i]['savedsearches'] = 'pma__savedsearches';
//$cfg['Servers'][$i]['central_columns'] = 'pma__central_columns';
//$cfg['Servers'][$i]['designer_settings'] = 'pma__designer_settings';
//$cfg['Servers'][$i]['export_templates'] = 'pma__export_templates';
編集後:
/* Storage database and tables */
$cfg['Servers'][$i]['pmadb'] = 'phpmyadmin';
$cfg['Servers'][$i]['bookmarktable'] = 'pma__bookmark';
$cfg['Servers'][$i]['relation'] = 'pma__relation';
$cfg['Servers'][$i]['table_info'] = 'pma__table_info';
$cfg['Servers'][$i]['table_coords'] = 'pma__table_coords';
$cfg['Servers'][$i]['pdf_pages'] = 'pma__pdf_pages';
$cfg['Servers'][$i]['column_info'] = 'pma__column_info';
$cfg['Servers'][$i]['history'] = 'pma__history';
$cfg['Servers'][$i]['table_uiprefs'] = 'pma__table_uiprefs';
$cfg['Servers'][$i]['tracking'] = 'pma__tracking';
$cfg['Servers'][$i]['userconfig'] = 'pma__userconfig';
$cfg['Servers'][$i]['recent'] = 'pma__recent';
$cfg['Servers'][$i]['favorite'] = 'pma__favorite';
$cfg['Servers'][$i]['users'] = 'pma__users';
$cfg['Servers'][$i]['usergroups'] = 'pma__usergroups';
$cfg['Servers'][$i]['navigationhiding'] = 'pma__navigationhiding';
$cfg['Servers'][$i]['savedsearches'] = 'pma__savedsearches';
$cfg['Servers'][$i]['central_columns'] = 'pma__central_columns';
$cfg['Servers'][$i]['designer_settings'] = 'pma__designer_settings';
$cfg['Servers'][$i]['export_templates'] = 'pma__export_templates';
これでエラーが一つ消えた。
暗号化用非公開パスフレーズ云々のやつ
設定ファイルに、暗号化 (blowfish_secret) 用の非公開パスフレーズの設定を必要とするようになりました。
これは、先程とおなじくconfig.inc.phpの以下の部分にパスフレーズを入力すればよし。
/**
 * This is needed for cookie based authentication to encrypt password in
 * cookie. Needs to be 32 chars long.
 */
$cfg['blowfish_secret'] = 'X5rrRbetX6qUKCdxqWJO6dOQ0gI6326YmAgeEkXR'; /* YOU MUST FILL IN THIS FOR COOKIE AUTH! */
また一つエラーが消えた。
tmpにアクセスできないやつ
$cfg[‘TempDir’] (/var/www/phpmyadmin/tmp/) にアクセスできません。phpMyAdmin はテンプレートをキャッシュすることができないため、低速になります。
これは、tmpファイルを作成して適切なパーミッションを与えればOK。
# cd /var/www/phpmyadmin/
# mkdir tmp
# chmod 755 tmp
以上。
次はこれ: